When you sell products that have different delivery times, your customers want to know when their orders will arrive. Some products might ship the same day, while others take weeks to fulfill. Shopify doesn’t give you an easy way to show different delivery times for each product by default, but you can solve this using metafields to add custom delivery information that displays on both collection pages and product pages.
How to set up delivery lead times
Step 1: Create the metafield definition
First, you need to create a custom field that will store your delivery information.
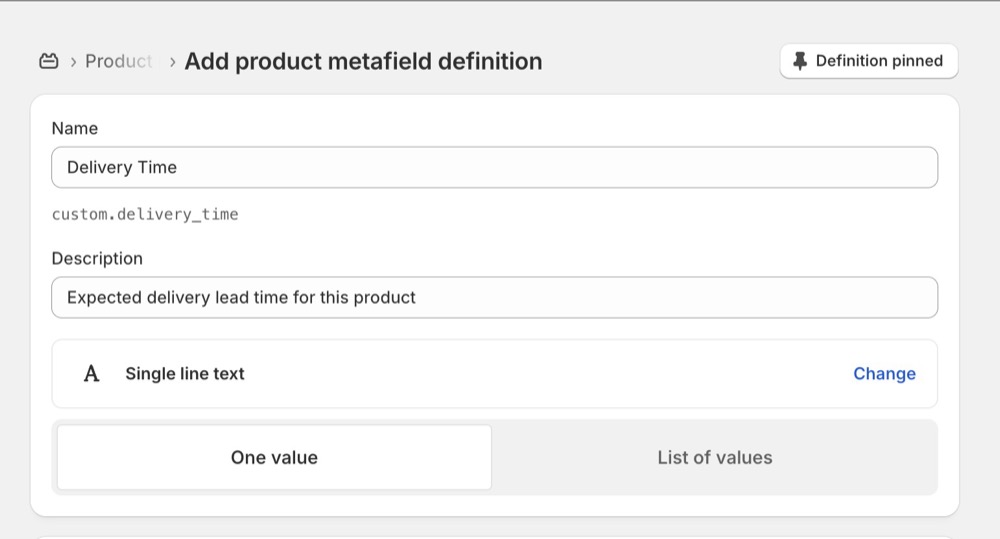
Go to your Shopify admin and click on Settings, then Metafields. In the Metafields section, click on Product metafields. Click the Add definition button to create a new field.
Fill out the form with these details:
- Name: Delivery Time
- Namespace: custom
- Key: delivery_time
- Description: Expected delivery lead time for this product
- Type: Single line text field

If you want to save time when adding delivery times to products, check the box that says “Limit to preset choices” and add common options like “Ships same day”, “3-5 business days”, “1-2 weeks”, and “2-3 weeks”. This creates a dropdown menu instead of having to type the same information repeatedly.
Click Save to create your metafield definition.
Step 2: Add delivery times to your products
Now you can add specific delivery information to each product.
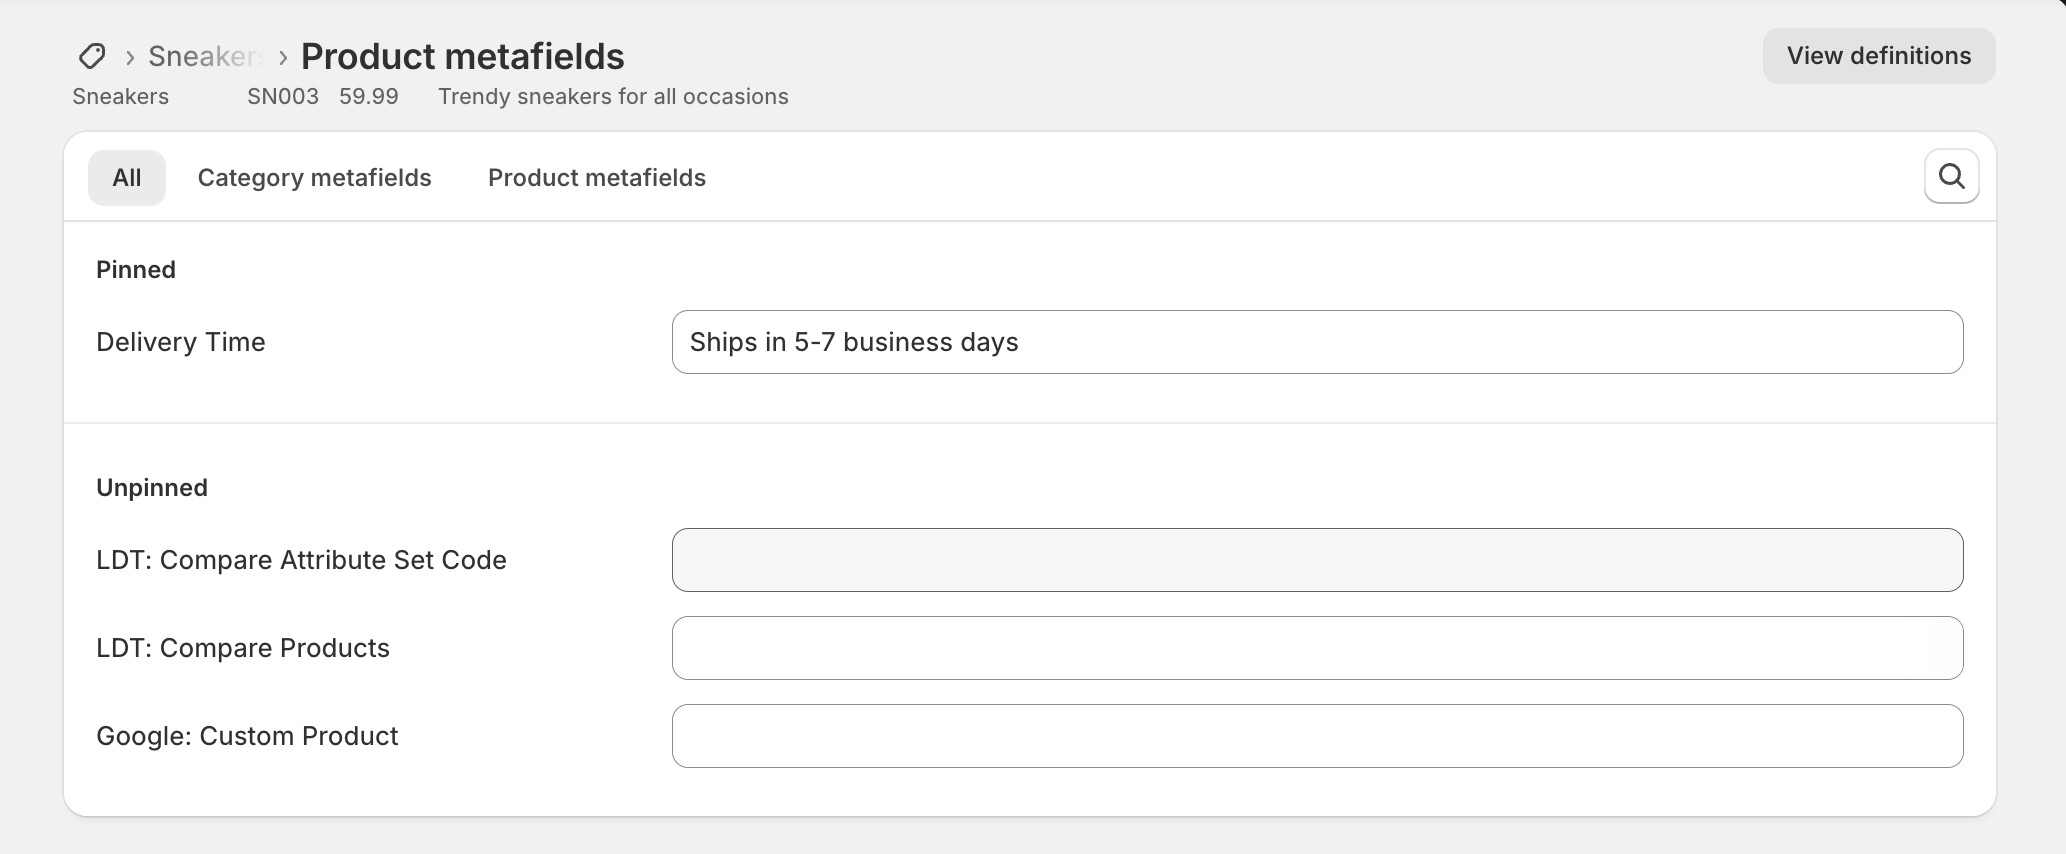
Go to Products in your Shopify admin and select any product. Scroll down until you see a section called Metafields. You should see your new “Delivery Time” field here.
Enter the delivery time for this product. For example, you might write “Ships in 5-7 business days” or “Made to order – 3 weeks”. Use clear, consistent language that your customers will understand.
Save the product and repeat this process for other products. If you have many products, you can use Shopify’s bulk editor or CSV import feature to add delivery times faster.

Step 3: Display delivery times on your store
To show delivery times on both your collection pages and product pages, you need to edit your theme code.
Go to Online Store, then Themes. Find your current theme and click Actions, then Edit code.
For collection pages:
Look for the file that controls how products appear in collections. This is usually called something like “product-card.liquid”, “product-grid-item.liquid”, or “collection-template.liquid”.
Find the section of code that shows the product price. This is usually near some text that says “price” or contains dollar signs. Right after the price section, add this code:
{%- if product.metafields.custom.delivery_time != blank -%}
  <div class="product-delivery-time">
    {{ product.metafields.custom.delivery_time }}
  </div>
{%- endif -%}
For product pages:
Look for files called “product.liquid” or “product-template.liquid”. Find a good spot to add the delivery information, such as near the product description or add to cart button.
Add this code:
{%- if product.metafields.custom.delivery_time != blank -%}
  <div class="delivery-info">
    <h4>Delivery time</h4>
    <p>{{ product.metafields.custom.delivery_time }}</p>
  </div>
{%- endif -%}
Both pieces of code check if a product has delivery time information and display it only if it exists.
Step 4: Style the delivery information
To make the delivery times look good and match your store design, add some CSS styling.
In your theme editor, look for a file called “theme.css”, “styles.css”, or similar. Add this CSS code:
.product-delivery-time {
  font-size: 14px;
  color: #666;
  margin-top: 8px;
  padding: 6px 10px;
  background-color: #f8f9fa;
  border-radius: 4px;
  display: inline-block;
}

.delivery-info {
  margin: 20px 0;
  padding: 15px;
  border: 1px solid #e1e1e1;
  border-radius: 6px;
  background-color: #f9f9f9;
}

.delivery-info h4 {
  margin: 0 0 8px 0;
  font-size: 16px;
  color: #333;
}

.delivery-info p {
  margin: 0;
  color: #2c5530;
  font-weight: 500;
}
This styling makes the delivery information stand out without being too bold or distracting.
Managing delivery times efficiently
If you have thousands of products, entering delivery times one by one isn’t practical. Here are faster methods:
For products from the same supplier, you can use Shopify’s bulk editor. Go to Products, select multiple products using the checkboxes, then click Edit products. This lets you add the same delivery time to many products at once.
You can also export your products to a CSV file, add delivery times in a spreadsheet program, then import the file back to Shopify. When importing, make sure to map your delivery time column to the correct metafield.
If you want to automate this process, consider using Shopify apps designed for metafield management or delivery date estimation. These can set delivery times automatically based on rules you create.
Conclusion
Adding delivery lead times to your Shopify products helps manage customer expectations and reduces support questions about shipping. Using metafields lets you show specific delivery information for each product, and once set up, adding delivery times to new products is quick and easy.
