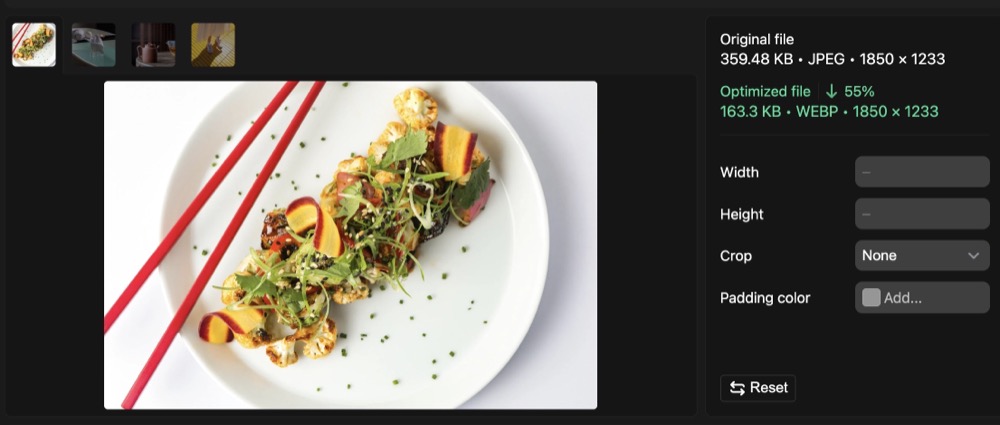
The performance of a Shopify site has a strong impact on keeping customers engaged. Even if a site is aesthetically stunning and packed with high-quality images, it will lose customers if it takes a very long time to load. After all, in the age of social media, attention spans are short. Image optimisation is one tactic to improve the speed of your Shopify site. Yet it’s often overlooked. We care about helping you create the best Shopify websites possible, so we’ve assembled this guide on how to optimise images across your Shopify site.
What is image optimisation?
Image optimisation in Shopify means processing your images and how they load on site, so your store loads faster for site visitors.
How to optimise images on Shopify by using Shopify CDN and Theme Code
Understanding the Shopify CDN
Shopify’s Content Delivery Network (CDN) is a powerful tool that significantly enhances image optimisation across your online store. This global network of servers works tirelessly to ensure that your images are delivered quickly and efficiently to customers worldwide. When you upload an image to your Shopify store, it’s automatically distributed to multiple servers strategically located around the globe. This distribution means that when a customer visits your site, the images are served from the nearest server, dramatically reducing load times and improving overall user experience.
The Shopify CDN doesn’t just distribute your images; it also optimises them automatically. This process includes compressing images to reduce file sizes without noticeably affecting quality, and converting them to more efficient formats like WebP when the visitor’s browser supports it. Furthermore, the CDN employs intelligent caching mechanisms. Frequently accessed images are stored in cache, allowing for near-instantaneous loading on repeat visits. This caching system, combined with the CDN’s robust infrastructure, ensures that your store can handle high traffic volumes without compromising on performance or user experience.

Implementing CDN-friendly code in your theme
While the Shopify CDN does much of the heavy lifting, developers can further enhance image optimisation by incorporating specific code into the Shopify theme. This is primarily achieved through the use of Liquid filters, which are powerful tools for manipulating and optimising images on the fly.
The image_tag filter is a versatile tool that generates an HTML <img> tag with several built-in optimisations. For example, the following code:
{{ product.featured_image | image_tag: width: 300, height: 300, crop: 'center' }}This seemingly simple line of code does a lot behind the scenes. It creates a responsive image that automatically adjusts to different screen sizes, converts the image to WebP format for browsers that support it, enables lazy loading to improve page load times, and preserves the aspect ratio of the image. The crop: ‘center’ parameter ensures that the image is cropped from the center when resized, maintaining the focus on the most important part of the image.
Another powerful tool is the img_url filter. This filter allows for the generation of custom image URLs with specific dimensions and cropping options. For instance:
{{ product.featured_image | img_url: '300x300', crop: 'center' }}This filter provides more granular control over image presentation. It allows developers to create multiple versions of the same image for different contexts, such as thumbnails, product pages, or banner images. The filter also supports various cropping options beyond just ‘center’, including ‘top’, ‘bottom’, ‘left’, and ‘right’, giving developers precise control over how images are displayed.
Additionally, the img_url filter supports the format parameter, allowing developers to specify the image format explicitly. This can be particularly useful when you need to ensure a specific format is used, such as PNG for graphics with transparency.
What are the benefits of optimising images?
For end users
For those managing the theme and content of a Shopify store, these optimizations bring several concrete benefits. Firstly, it significantly reduces the need for manual image editing before upload. Store owners can upload high-quality, high-resolution images without worrying about file size or dimensions, as the CDN and theme code will handle the optimization.
However, it’s important to note that while the system is highly efficient, some basic image preparation can still be beneficial. For instance, cropping an image to the correct aspect ratio before upload can ensure that the important parts of the image are always visible, regardless of how it’s displayed on the site. Similarly, while the CDN will compress images, starting with a reasonably sized file (e.g., not uploading a 20MB image for a small product thumbnail) can help streamline the process.
When adding images to various sections of the site, users should focus on selecting appropriate, high-quality images that suit the content and layout of each block. The theme’s code will handle the technical aspects of displaying these images optimally across different devices and screen sizes.
This system also provides flexibility in terms of image management. If a store owner decides to change the layout of their site or adjust image sizes, in many cases, they won’t need to re-upload or manually resize images. The theme code can often handle these changes automatically, pulling appropriately sized versions from the CDN.
For the Core Web Vitals
When a Shopify theme effectively utilizes the CDN and implements proper image optimisation techniques, the results can be impressive. One of the most noticeable improvements is in PageSpeed scores. Google’s PageSpeed Insights tool often flags image-related issues as significant factors affecting page load times. A well-optimised Shopify site can see dramatic improvements in these scores, potentially boosting search engine rankings.
Core Web Vitals, a set of metrics that Google uses to quantify user experience, also benefit greatly from proper image optimisation. The “Largest Contentful Paint” (LCP) metric, which measures loading performance, is often heavily influenced by image loading times. By serving appropriately sized, compressed images from nearby CDN servers, LCP times can be significantly reduced.
Moreover, the “Cumulative Layout Shift” (CLS) metric, which quantifies visual stability, can be improved through proper image handling. By specifying image dimensions in the theme code, the layout is less likely to shift as images load, creating a smoother, more stable user experience.
All these optimisations culminate in faster overall load times for your Shopify store. This speed improvement is not just a technical metric; it translates directly to user experience. Learn how to calculate your hosting cost per sale and identify potential savings.
Faster-loading pages lead to lower bounce rates, higher engagement, and ultimately, can contribute to improved conversion rates. In the competitive world of e-commerce, these performance gains can provide a significant edge, helping to create a smooth, professional shopping experience that keeps customers coming back.

Notes if your Shopify does not set up CDN or theme code
If you’re not setting up a CDN or don’t have the technical knowledge to modify the theme code, you need to be meticulous about using images correctly before uploading them.
Choosing the right image format
There are different image formats that you can choose. Here are 4 common and essential information of each
- JPEG: Ideal for photographs and images with lots of colours. It provides good quality with a smaller file size.
- PNG: Best for images with transparency or simple graphics. It maintains high quality but has a larger file size.
- GIF: Suitable for simple animations. However, it’s not ideal for high-quality images due to its limited color palette. WebP: Offers high quality and smaller file sizes. It’s great for both images and animations but may not be supported by all browsers.
- AVIF: A newer format that provides excellent compression and quality. It’s great for future-proofing your images but may not be widely supported yet.
If you’re looking for an all-around great format, WebP is often the best choice because it combines high quality with smaller file sizes. However, since it might not work in all web browsers, having backup options like JPEG and PNG will make sure your images show up correctly on all devices.
Compressing images before upload
This is the work of making images smaller without losing much quality, so your site loads quickly. Try out these free tools to get the job done easily:
TinyPNG: Shrinks PNG and JPEG files, making them smaller but still looking good.
ImageOptim: Great for compressing lots of images at once without losing quality.
IloveIMG: work with PNG, JPEG, SVG and GIF
Kahunam Image Processor: developed by Kahunam and 100% free.
To keep your Shopify store running smoothly, aim for these suggested ideal file sizes:
- Product Images: 70-200 KB to balance quality and loading speed.
- Collection Images: 150-300 KB to ensure good visual quality without slowing down your site.
- Banner Images: 100-250 KB to fit well within most themes while loading quickly.
- Blog Post Images: 100-200 KB to keep your blog visually appealing and fast-loading.
Adding alt text to images
Alt text is a short description of an image that helps people and search engines understand what the image is about.
Writing alt text helps people who use screen readers know what the image shows. For SEO, search engines use alt text to figure out and rank your images.
When writing alt text, use relevant keywords naturally. Don’t overdo it with keywords and make sure your descriptions are accurate.

Resizing images
Resizing images is an important step in making sure they fit perfectly on your website. It’s also a good idea to check if your images look good on mobile devices.
You can do it with Shopify’s Built-in Image Editor. It is a simple tool right in your admin panel that lets you resize images. You can crop, resize, and adjust them to fit your store’s look perfectly.
If you are not a fan of it, try these 3 tools
- GIMP is a free program that’s like Photoshop. You can use it to resize, crop, and optimize your images.
- Fotor is an online photo editing tool that’s easy to use. It lets you resize images and do basic edits quickly.
- PicResize is an online tool made just for resizing images. It lets you resize many images at once and offers different options to get them ready for your Shopify store.
Suggested image size to use in Shopify:
Product Images: 2048 x 2048 pixels This size makes sure your products look sharp and allows customers to zoom in for a detailed view.
Collection Images: 1024 x 1024 pixels This size keeps your collection images looking good without making your site slow.
Banner Images: 1200 x 600 pixels This size works well for banners, fitting nicely on both desktop and mobile.
Blog Post Images: 1200 x 800 pixels This size is great for blog posts, keeping them attractive and quick to load.
Slideshow Images: 1200 x 800 pixels This size is perfect for homepage slideshows, giving a good balance between quality and speed.
Thumbnail Images: 400 x 400 pixels This size is ideal for smaller images, loading quickly while still looking sharp.
FAQ
What are the implications of using client-side vs. server-side image rendering for Shopify’s performance and scalability?
Deciding how to show images on your Shopify site affects how quickly it loads and handles traffic. If you show images on the user’s device (client-side), it can make things faster but might affect how things look. If you process images on your server (server-side), it can handle more complicated tasks but might slow down how quickly pages load at first.
Conclusion
Optimising images help your web performance consistently smooth. It’s something we recommend you audit regularly, to make sure that no “unoptimised” images have slipped through the net and are now dragging down your web performance scores.
