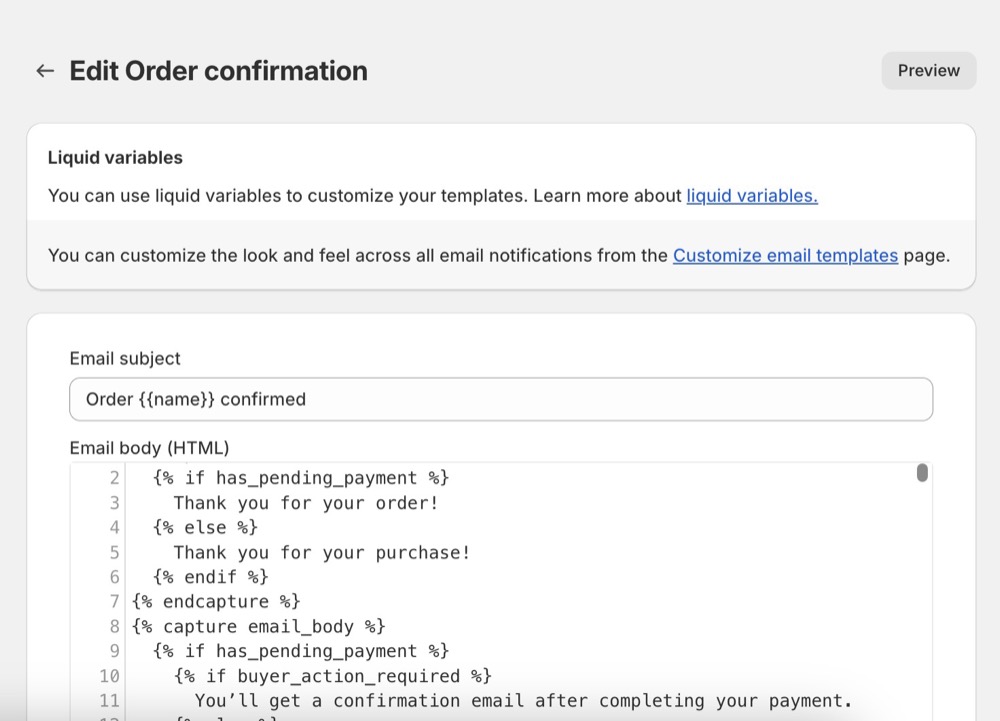
Customising your Shopify emails is a great way to give your customers extra help, like adding instructions on how to set up or use their new purchase. In this guide, we’ll show you how to add a clickable link to your Shopify emails using some simple code. Whether you’re new to Shopify or have been using it for a while, this step-by-step guide will make it easy to improve your customer communications.
What are Shopify order emails
Shopify automatically sends emails to your customers when they do things like place an order or sign up for an account. By default, these emails are standard, but you can make changes to them to include extra information or links.
How to add a link to product instructions in Shopify
Following our guides to add link to your order emails:
You can start by logging into Shopify and going to Settings > Notifications. Here you’ll find all the different emails that Shopify sends out like customer notifications, staff notifications, etc. You can pick which ones to edit.
Let’s say you want to add a link to instructions in the Order Confirmation email. Click on that option.
It’s a good idea to have a look at the email before you make changes. This will show you what your customers see and help you decide where to put the link. It’s best to put important links near the top, so customers don’t miss them.
Pro Tip: You should also consider backing up the email code before you edit it, just so it’s easy for you to revert back in case things don’t work as expected. This can be as simple as copying and pasting the entire email content into a Text file on your computer and saving it, before making your edits.
Now for the link. To find the right spot to add it, look for text in the email like ‘Thank you for your purchase’ or ‘View your order’.

Once you’ve found the right place you can add in some code to create a link in the email. Here is some example code that you can customise:
<a href="https://www.yourlink.com">Product Usage Instructions</a>Here’s a quick breakdown of what this code means
- <a> and </a> create a clickable link.
- href=”https://www.yourlink.com” is the web address your customer will be taken to when they click the link.
- The words between the tags, in this case, Installation Instructions, are what your customer will see and click on in the email.
Some simple tips for customising emails
- Make sure the link is close to the top so customers don’t miss it.
- Instead of using ‘Click Here’, go for something more useful like ‘See Installation Instructions’.
- Before sending the email to customers, make sure you test it to check how it looks and works on both desktop and mobile.
Why should you customise Shopify emails?
Making your Shopify emails more personal can help you:
- Improve your customer service.
- Provide helpful resources like how-to guides or videos.
- Add special offers or other personalised messages.
Adding a link to installation instructions in your order confirmation email is an easy way to ensure your customers know exactly what to do when their product arrives.
Frequently Asked Questions (FAQs)
What if I make a mistake in the code?
If you accidentally make a mistake, don’t worry! Shopify allows you to revert changes to previous versions. Just remember to save a backup of your email template before making any edits.
Is there a limit to how many links I can add to an email?
While there’s no strict limit, it’s best to keep it simple. Too many links can overwhelm your customers. Focus on adding the most relevant and helpful links.
Can I schedule when the emails are sent?
Yes, Shopify allows you to set triggers for when emails are sent, such as immediately after an order is placed or after the order has been shipped.
Conclusion
Customising your Shopify emails can make a big difference to your customer experience. By adding a simple link to product instructions, you can help your customers feel more confident about using their purchase and reduce any confusion. If you need help with this, don’t hesitate to get in touch with Kahunam.


