
Mailchimp and WordPress work together to help you build your email list and run effective marketing campaigns. Whether you want to add a simple signup form, create popups, or sync your WooCommerce customers, this guide covers every method to integrate Mailchimp with WordPress.
🌊 Too busy to manage your WordPress site? Our expert team handles all your website needs – from fixes to improvements – while you focus on running your business. Start with our WordPress retainer service →
Why Integrate Mailchimp with WordPress?
Connecting Mailchimp to your WordPress site lets you:
- Grow your email list automatically – Capture subscribers directly from your website
- Sync customer data – Keep your contact information up to date across platforms
- Track campaign performance – See which emails drive traffic back to your site
- Automate marketing – Trigger emails based on user actions on your site
- Segment your audience – Collect data to send targeted campaigns
Getting Your Mailchimp API Key
Most integration methods require your Mailchimp API key. Here’s how to find it:
- Log in to your Mailchimp account
- Click your profile icon in the bottom left
- Select Account & billing
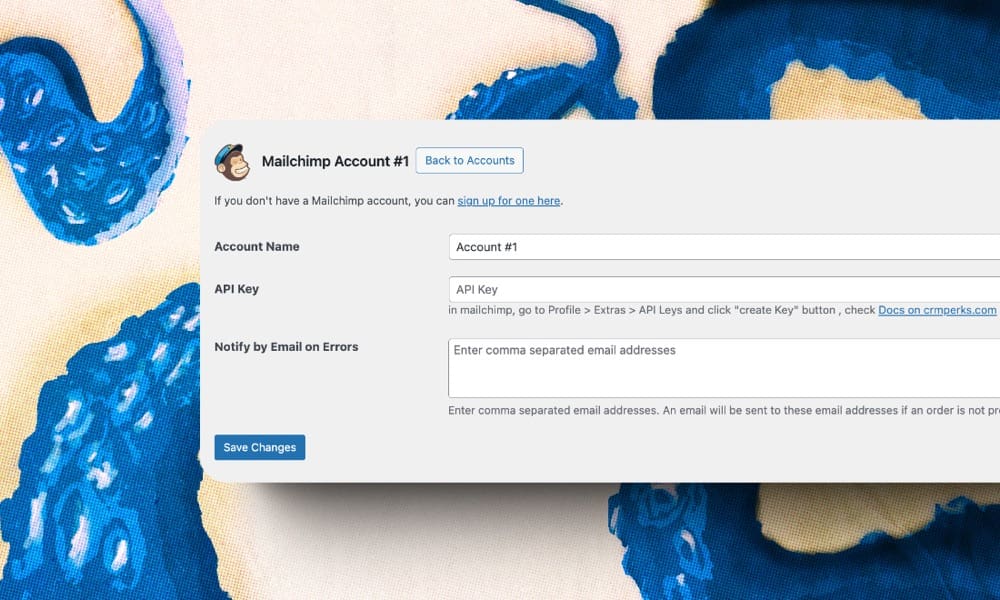
- Go to Extras → API keys
- Click Create A Key
- Give your key a descriptive name (e.g., “WordPress Site”)
- Copy the API key and store it securely – you won’t see it again
Important: Keep your API key private. Anyone with this key can access your Mailchimp account.
Method 1: Use the Native Mailchimp Block (Easiest)
WordPress includes a built-in Mailchimp block that requires no plugins. This is the quickest way to add a signup form.
How to Add the Mailchimp Block
- Open any post or page in the WordPress editor
- Click the + button to add a new block
- Search for “Mailchimp” and select the Mailchimp block
- Click Connect to link your Mailchimp account
- Authorise WordPress to access your Mailchimp data
- Select which audience (list) to add subscribers to
- Customise the form appearance in the block settings
The native block works well for basic signup forms but has limited customisation options.
Method 2: Mailchimp for WordPress Plugin (MC4WP)
MC4WP is the most popular Mailchimp plugin with over 2 million active installations. It offers more flexibility than the native block.
Installation and Setup
- Go to Plugins → Add New in WordPress
- Search for “Mailchimp for WordPress”
- Install and activate the plugin
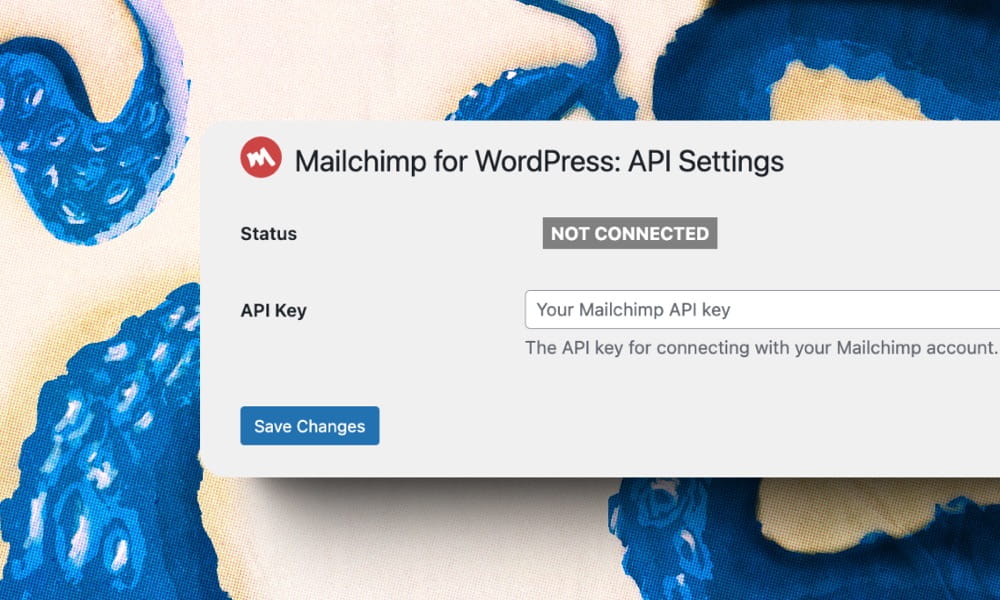
- Navigate to MC4WP → Mailchimp
- Paste your API key and click Save Changes
- Your Mailchimp audiences will appear automatically
Creating Forms with MC4WP
- Go to MC4WP → Form
- Choose which Mailchimp list subscribers should join
- Customise the form HTML or use the visual builder
- Add fields like name, email, birthday, or custom fields
- Style your form using CSS
- Copy the shortcode
[mc4wp_form] - Paste the shortcode anywhere on your site
MC4WP Premium Features
The free version handles most needs. The premium version adds:
- Multiple forms with different designs
- Advanced reporting and analytics
- User sync (sync WordPress users to Mailchimp)
- E-commerce tracking
- AMP form support
Method 3: Mailchimp’s Official Plugin
Mailchimp offers their own official WordPress plugin which focuses on e-commerce integration.
Setup Process
- Install “Mailchimp for WooCommerce” from the plugin directory
- Click Connect Account in the setup wizard
- Log in to Mailchimp and authorise the connection
- Configure your store settings (name, email, address)
- Select your Mailchimp audience
- Enable automatic syncing
This plugin is ideal if you run WooCommerce and want to sync customer purchase data with Mailchimp for targeted campaigns.
Method 4: Form Plugin Integrations
If you already use a form plugin, you can connect it directly to Mailchimp.
Contact Form 7 + Mailchimp
Contact Form 7 doesn’t have built-in Mailchimp support. Use the Integration for Mailchimp and Contact Form 7 plugin:
- Install and activate the integration plugin
- Go to Contact → Mailchimp
- Enter your Mailchimp API key
- Edit your Contact Form 7 form
- Go to the Mailchimp tab
- Select your audience and map form fields to Mailchimp fields
WPForms + Mailchimp
WPForms includes Mailchimp integration in their Plus plan ($99/year):
- Go to WPForms → Addons
- Install the Mailchimp addon
- Edit your form and go to Marketing → Mailchimp
- Connect your Mailchimp account
- Map your form fields
Gravity Forms + Mailchimp
Gravity Forms offers a Mailchimp addon with their Basic license ($59/year):
- Go to Forms → Add-Ons
- Install the Mailchimp Add-On
- Go to Forms → Settings → Mailchimp
- Enter your API key
- Edit your form and add a Mailchimp feed
Ninja Forms + Mailchimp
Ninja Forms includes Mailchimp with their Plus plan ($99/year):
- Go to Ninja Forms → Add-Ons
- Install the Mailchimp extension
- Edit your form and go to Emails & Actions
- Add a Mailchimp action and configure the connection
Method 5: Elementor + Mailchimp
Elementor Pro includes a Form widget with direct Mailchimp integration:
- Drag the Form widget onto your page
- Add your form fields (email, name, etc.)
- Go to Actions After Submit
- Add Mailchimp as an action
- Enter your API key and select your audience
- Map form fields to Mailchimp fields
This method gives you complete design control while keeping submissions synced with Mailchimp.
Method 6: Add Mailchimp Popups
Popups can significantly increase signup rates when used appropriately.
Using Mailchimp’s Built-in Popups
- Log in to Mailchimp and go to Audience
- Click Signup forms → Subscriber pop-up
- Design your popup using the editor
- Configure display settings (timing, frequency)
- Copy the generated code
- In WordPress, paste the code before the closing
</body>tag
You can add the code using a plugin like WPCode or your theme’s custom code area.
Using Popup Plugins
For more control, use a dedicated popup plugin:
- OptinMonster – Advanced targeting and A/B testing
- Popup Maker – Free with Mailchimp integration
- Convert Pro – Works with any page builder
- Elementor Pro – Built-in popup builder
WooCommerce + Mailchimp Integration
If you run an online store, syncing WooCommerce with Mailchimp enables powerful e-commerce marketing.
What Gets Synced
- Customer data – Names, emails, addresses
- Purchase history – What they bought and when
- Order value – Total spend per customer
- Product data – Your catalogue for product recommendations
- Abandoned carts – Recover lost sales with automated emails
E-commerce Automations
With WooCommerce data in Mailchimp, you can set up:
- Abandoned cart emails – Remind customers to complete purchase
- Post-purchase follow-ups – Thank you emails and review requests
- Product recommendations – Based on purchase history
- Win-back campaigns – Re-engage inactive customers
- Order notifications – Shipping and delivery updates
Embedding Forms Without Plugins
You can add Mailchimp forms using embed code if you prefer not to use plugins.
Get Your Embed Code
- In Mailchimp, go to Audience → Signup forms
- Select Embedded forms
- Choose your form style (classic, condensed, horizontal, unstyled)
- Customise the fields and design
- Copy the generated HTML code
Add to WordPress
- Edit the page or post where you want the form
- Add a Custom HTML block
- Paste the Mailchimp embed code
- Save and preview
You may need to add custom CSS to style the form to match your site.
Troubleshooting Common Issues
Subscribers Not Appearing in Mailchimp
- Check your API key – Ensure it’s entered correctly without extra spaces
- Verify the audience – Make sure the right list is selected
- Check for double opt-in – Subscribers may need to confirm via email
- Look in All Contacts – They might be unsubscribed or cleaned
Form Not Displaying
- Check shortcode placement – Ensure it’s not inside another shortcode
- Clear cache – Caching plugins may show old content
- Check for JavaScript errors – Open browser console to see errors
- Test in incognito mode – Rule out browser extensions
Connection Errors
- API key expired – Generate a new key in Mailchimp
- Server blocking requests – Ask your host to whitelist Mailchimp
- SSL issues – Ensure your site uses HTTPS
- Plugin conflicts – Temporarily disable other plugins to test
Best Practices for Mailchimp + WordPress
Optimise Your Signup Forms
- Keep forms short – Email only, or email + first name maximum
- Offer value – Explain what subscribers will receive
- Use clear CTAs – “Get Weekly Tips” beats “Subscribe”
- Place forms strategically – After content, in sidebar, in footer
Stay GDPR Compliant
- Add consent checkboxes – Required for UK/EU subscribers
- Link to privacy policy – Explain how you use their data
- Enable double opt-in – Confirms subscribers want your emails
- Include unsubscribe links – Mailchimp adds these automatically
Monitor Performance
- Track conversion rates – Which forms perform best
- A/B test forms – Try different headlines and designs
- Check list growth – Monitor new subscribers weekly
- Review automations – Ensure triggered emails are sending
FAQ
Is Mailchimp free to use with WordPress?
Mailchimp offers a free plan for up to 500 contacts and 1,000 monthly emails. The MC4WP plugin is also free. Paid plans start at around £10/month for additional features and higher limits.
Which integration method is best?
For most sites, MC4WP offers the best balance of features and ease of use. If you run WooCommerce, use Mailchimp’s official plugin for e-commerce features. If you already use a form plugin like WPForms or Gravity Forms, their built-in integrations work well.
Can I connect multiple Mailchimp accounts?
Most plugins support one Mailchimp account per WordPress site. If you need multiple accounts, you can use different plugins for different forms, or use Mailchimp’s embed codes which don’t require plugin authentication.
How do I add custom fields to my signup form?
First create the custom field in Mailchimp (Audience → Settings → Audience fields and *|MERGE|* tags). Then add the corresponding field to your WordPress form and map it to the Mailchimp field in your integration settings.
Will changing my WordPress theme break the integration?
Plugin-based integrations survive theme changes. However, if you added Mailchimp code directly to your theme files, you’ll need to add it again to your new theme. Using a code snippets plugin prevents this issue.
